Do you want to install Teradata in your PC and start practicing today? Here is the Teradata installation guide with screenshots. Teradata releases pre-installed image for Teradata Express for Vmware Workstation/Player. By installing this, you can access teradata from your local system using Teradata SQL Assistant, Teradata Administrator or any other utilities like BTEQ, FASTLOAD, MLOAD etc. You can follow few simple steps as below:-
Prerequisite:-
- 64 bit vertuallization capable PC.[you can check it from BIOS setup]
- Minimum 3GB RAM. [4GB is recommended]
- Vmware workstation/Player. [Vmware workstation is recommended]
- Teradata 15.00.01 or any other version. [Teradata Express for Vmware Workstation/Player]
- td-ttu-15.00_for_Windows. [Teradata tools and utilities]
Step 1:-
You can download Teradata Express and Vmware workstation from Teradata site and Vmware site respectively. Once downloaded, you can unzip Teradata Express into some folder. Suppose you have unzipped it in a folder name “virtual”. You will end up with something like this- ” F:\virtual\TDExpressXX_Sles11_40GB “. Install Vmware workstation.
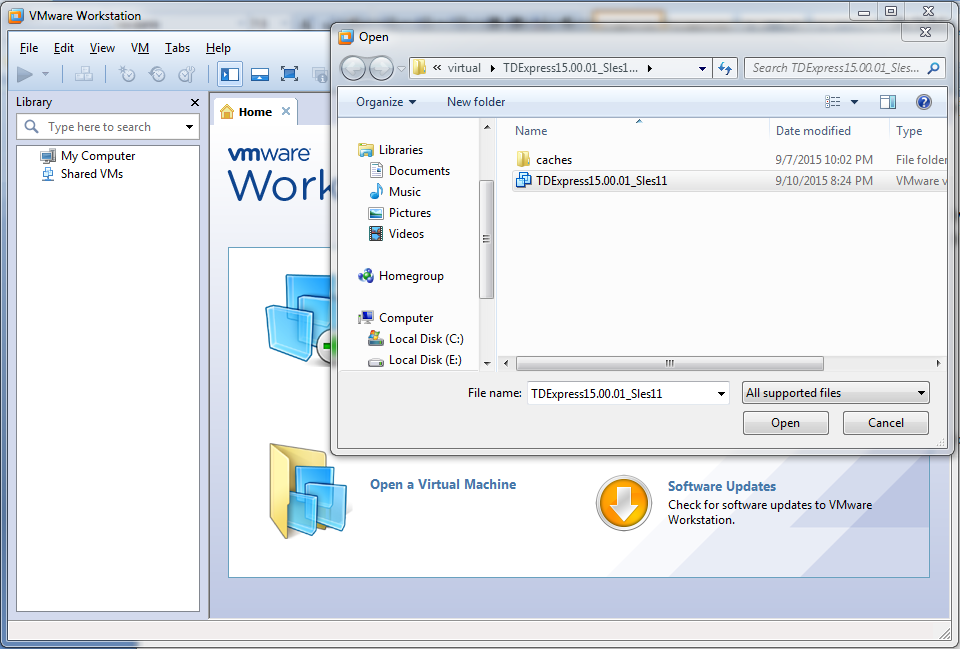
Step 2:-
Open VMware Workstation Welcome page, choose “Open a Virtual Machine” and navigate to Teradata express folder, looking for the ” TDExpress15.00.01_Sles11″ file.
Step 3:-
Once you find the image, open it by double clicking. Vmware will now ask you if you want to copy or move this image. Make sure to choose ‘I MOVED IT‘!
Step 4:-
Now click on “Power on this virtual machine”.

Step 5:-
Login into the SLES11 VM with username “root” and password “root”. Wait for sometimes, it will initialize the Teradata.
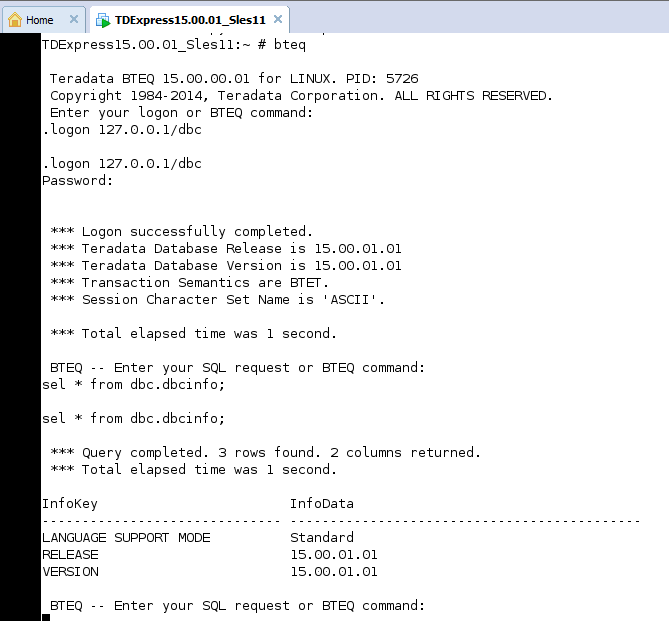
Step 6:-
Once it is ready, open Gnome terminal and you can check the status of Teradata database server using below command-
TDExpress15.00.01_Sles11:~# pdestate -a
PDE state is RUN/STARTED.
DBS state is 4: Logons are enabled – Users are logged on
TDExpress15.00.01_Sles11:~#
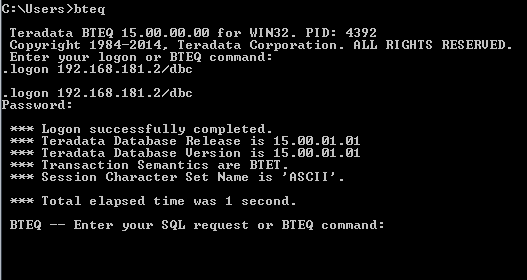
Now you can test the connectivity as well using bteq with username “dbc” and password “dbc”.
You have successfully completed the installation of fully functional Teradata server. If you want to access this Teradata database server from your local PC, few extra steps you may follow:-
Step 7:-
Download Microsoft .NET 4 or above and Teradata 15 TTU for windows. You need to install .NET framework prior to install Teradata Tools and Utilities(TTU).
Step 8:-
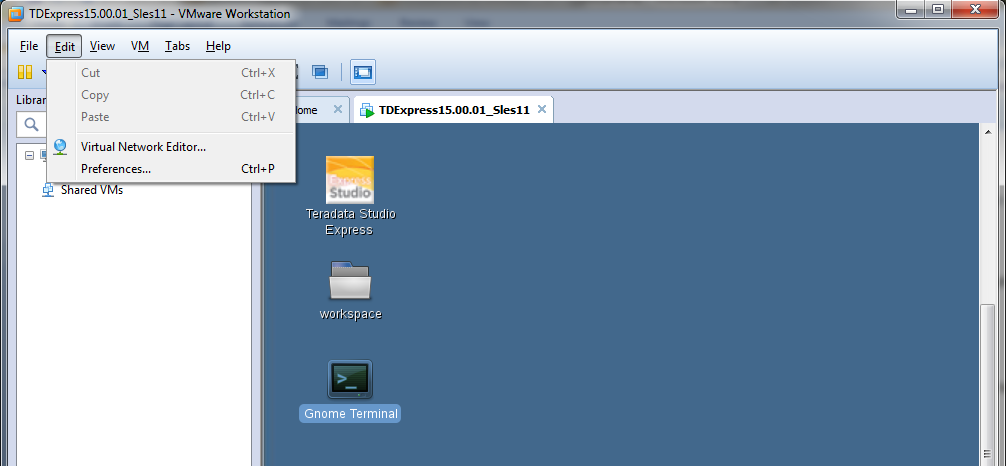
Once installation of TTU is done, set up the IP for VM and SLES11 to access it from your local system using Teradata SQL Assistant or any other utilities.
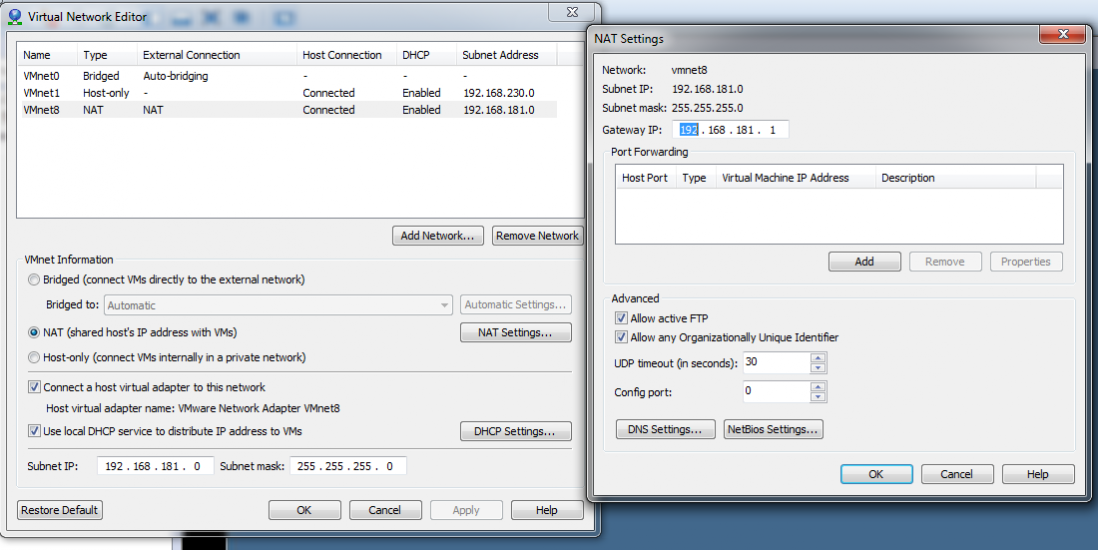
- Open Virtual Network Editor from the EDIT menu of VM.
- Select VMnet8 NAT setting and set up Gateway IP.
Suppose your NAT subnet Address is 192.168.181.0, you may provide Gateway IP as 192.168.181.1. Click OK.
- Now open Network Settings in SLES11 i.e. from the operating system within the Vmware.
Computer -> Control Center -> Network Settings -> Select Ethernet Network Card->Edit. Suppose Gateway IP is 192.168.181.1 in NAT setting, you have to enter 192.168.181.2 here as below-

Click Next.
- Now open command prompt in local system and ping this IP Address.
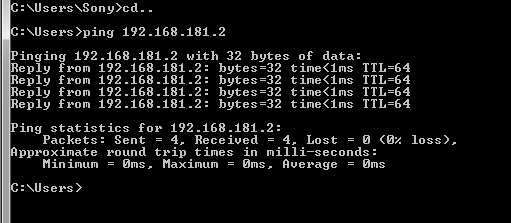
All done. Now you can use this IP Address(192.168.181.2) from your local ODBC driver, Teradata SQL Assistant or BTEQ to access Teradata database server.
In the next tutorial, we will show you how to use Teradata SQL Assistant to connect Teradata Database using ODBC driver.